This report covers:
- The task
- What to do?
- Problems
- Buying parts and tools
- Next
Yesterday’s report was a look at the differences in design between the cars and airguns of old and the ones we see today. Today we look at what it takes to repair a modern PCP. Do you remember that I finished that report by asking you if the Air Venturi Avenge-X is the Volkswagen Beetle of today? In this report we find out whether that is the case.
The task
You know I’ve been testing many of the new premium pellets that have come to market recently. Last week I wanted to use the Crosman Challenger PCP target rifle to test them. But when I picked up my rifle it had no air in the reservoir. That was odd because I always store my precharged pneumatics (PCP) with air in the reservoir to keep the valves closed. By the way, my Challenger is one generation older than the one on the Pyramyd AIR website.
When I tried to fill the rifle it wouldn’t take a fill. I also noted that the fill port seemed to have an o-ring that was extruding out of its hole. I spent an hour working on that rifle, only to discover that there were apparently several problems. The fill port seal was extruding, the firing valve seemed to be leaking and that could have been any number of things.
What to do?
I know! I’ll make it a report and let you watch me repair the Challenger. But that will take dozens of pictures and readers like Yogi who only like springers will fall asleep, trying to keep up. What this needs is a video — a GOOD video! Fortunately for you (and me) there is one.
I knew I had to repair this rifle and I wondered if anyone had done a video to at least show some of the steps. Well, the one video that exists is on You Tube and it shows ALL of the steps! It’s the kind of video I would like to be able to make. Reader 45 Bravo — that is a hint to you.
I will link to the video today, but a word of caution — this one is 65 minutes long. That sounds like a huge amount of stuff, but it really isn’t. The presenter, Colby Sakumoto, walks you step-by-step through the process of disassembling and resealing the Challenger target rifle. Yes, there are many steps but each one is simple.
This is the kind of learning video where you can do the same task in less time than the video takes to present it. You don’t have to watch the whole thing. Just watch a few minutes at the start to see how clearly things are presented.
I show the video today, but I’m not going to repair my Challenger today. I have ordered and received all the parts and tools needed for the job, but I’m probably going to do the work on a weekend, just in case I run into a problem that takes too much time. Remember — after I do the work I have to write the report. Let’s talk about what I did to get ready next. But before we do I’d like to say a word about springers.
The TX200 is very much the same as the Challenger when it comes to repairs, only it has many less steps. That one is so simple that I can write a report about how to do it. Okay — back to the Challenger.
Problems
I thought I had to purchase many small parts to repair things like the interior of the firing valve. That was how things were done when I first got into PCPs.
Instead, Colby shows how to just replace the entire valve assembly AS A UNIT. Why wouldn’t I do that, instead of spending hours disassembling a firing valve and replacing or resurfacing all of the parts inside — and then not knowing if I had fixed it until I assembled the entire rifle again? Just install a whole new valve. Back in the day such things were unheard of. Today that is the way things are done for the PCPs that are designed properly.
Remember when I asked if we were heading towards this approach again? I wondered if the Air Venturi Avenge-X was the VW Beetle of today. Well, apparently it is.
I remember guys replacing entire VW engines in a couple hours back in the day, just because they could. It wasn’t that expensive because there were shops set up to just refurbish them! Have we gone back to the future with airguns?
Buying parts and tools
My job changed from learning how to repair the firing valve of the Crosman Challenger to finding and buying all the parts and tools I needed to fix the rifle. Colby shows how it’s done and there is not one step that is beyond any of you readers. Maybe you don’t want to do the work, that’s your decision. But all of you should be able to do the work. Watch some of the video and see how simple each step is.
I went online and looked for all the parts. I needed a complete firing valve assembly. Archer Airguns had one in stock for $29.99. Let me tell you — spending thirty dollars is better than spending two days trying to resurface a nylon valve seat to mate with a brass valve face, only to discover there is still a hairline scratch in the nylon seat and air still leaks. And you don’t find it out until after the rifle has been assembled!
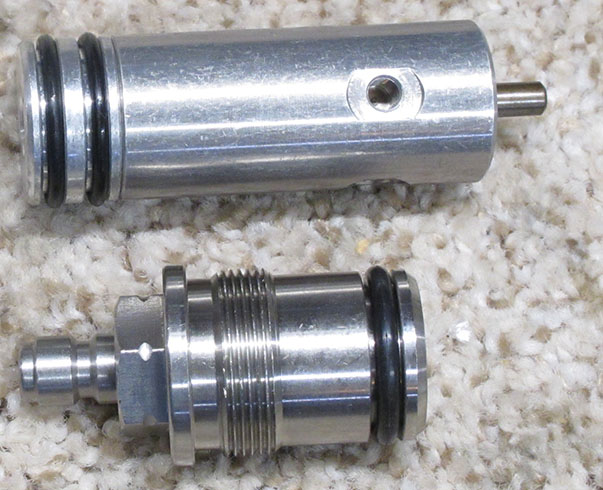
Firing valve (top) and fill valve assemblies can be purchased complete. No need to do delicate work on small parts that are difficult to test until they are inside the gun.
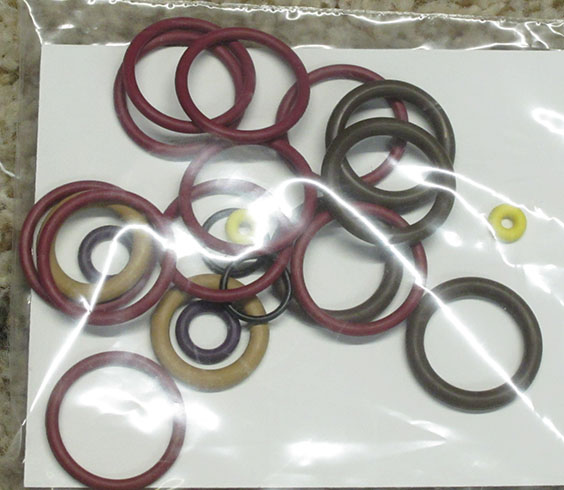
I bought the o-rings from Captain o-ring. There are two sets in the package and some may not be needed, depending on the state of the airgun.
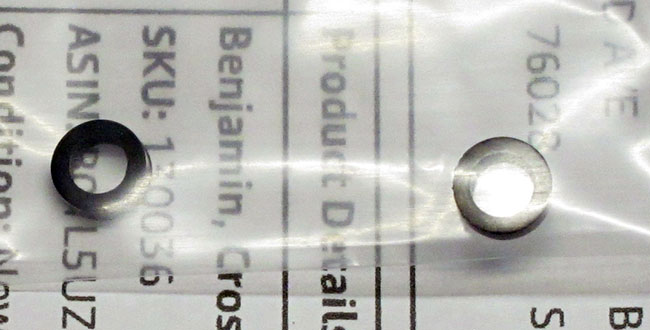
I bought these two transfer port seals from Captain o-ring. I should have waited to see the Archer Airguns website because they sell 5 for the same price. Only one is needed for the job.
Archer Airguns has most of the things you need for this. In fact for this job I think they have everything. Some of the parts are labeled for the Benjamin Discovery, but the fine print says they also work in the Challenger. And, guess what that means? What we are doing here will probably fix a Disco too.
I also bought some tools. No doubt I have several Crosman degassing tools laying about. I know I have because several of my Crosman rifles came with them. But I am not organized that way. Most of my stuff is in piles, turning into coal at the bottom. So I bought one.
This time though I’m putting the tool in a place where I can find it again, if I need it. I could just shoot the air out, but of course with my Challenger I don’t need to — it did it for me. It’s a self-degasser at present.

I probably have a couple degassing tools laying around, but as I don’t know where they are, I bought another.
I also bought a special tool to preserve the external surfaces of some of the o-rings as certain parts are slid back into place inside the reservoir tube. I have nicked enough seals in my time to appreciate the value of a tool like this! This tool is 3-D printed, so, reader 45Bravo, there you go! I would hate to assemble the rifle again, only to learn there was still a small leak because an o-ring was nicked!
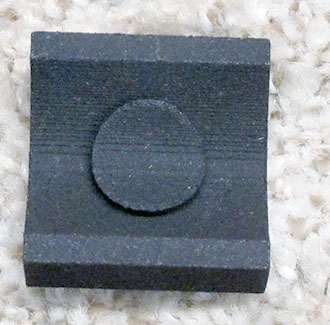
I call this an o-ring preservation tool. It saves certain o-rings from being nicked as they are slid through the reservoir tube.
Next
What comes next will be my report on fixing the Challenger rifle. Then I want to test it with those new premium pellets.
I will report on all the steps that you see in the video. No doubt there will be some surprises, but after watching the video I see that if I do what Colby shows, this should work well.
Summary
I’ll jump forward and tell you that after watching that video I believe that the modern airguns are very much like the Volkswagen Beetle when it comes to maintenance. We can do all the repairs that are required, and some of them are simple parts swaps — the valve assemblies being like the VW engine swaps.
I’m getting ahead of myself because I haven’t yet done the work. Boy, will I have egg on my face if this Challenger still leaks after I do everything! Oh, well!

B.B.
I still do not understand why somebody comes up with a modular trigger that is very good. Just think what a Walther Lothar barrel adds to the value of a PCP?
-Yogi
Yogi,
I have wondered the same thing. The Challenger uses the Marauder trigger because, as a sporting trigger, it is very close to a target trigger.
BB
This is going to be a very interesting project. Especially since I have a Crosman Challenger, albeit the newer 2021 model. I purchased it used. It was advertised “like new in box.” The serial number indicates it was manufactured in January of 2024. The velocity was down when I first started shooting it and it rapidly got much worse. Crosman suggested taking it to a nearby authorized service facility. But they were backed up many months and suggested another one. I sent it to him. He adjusted the velocity adjustment screw on the valve and sent it back to me. It shot at the proper velocity at first, then began losing velocity again at a rapid rate. I spoke with the repair guy and decided to adjust the velocity adjustment screw again myself. That brought the velocity back up to specs. But again it began to lose velocity at a rapid rate. The repair guy didn’t want me to send it back to him again and suggested sending it to Crosman. So I did send it to Crosman after trying to explain the situation to them. They replaced that little velocity adjustment screw and sent it back to me. It has worked great since then. I can only assume that the velocity screw that originally came with the rifle was slightly undersized (diameter) and, as the rifle was shot, that screw worked it’s way further into the valve than where it was set and reduced the velocity accordingly. The replacement velocity adjustment screw is apparently the correct size (diameter) and therefore stays in place better.
I will definitely watch the video and stay tuned to your next report! Thanks.
Yogi’s above comment and BB’s response reminds me that I have been remiss in my blogs concerning my Armada in not mentioning the trigger. The Armada is essentially a Marauder dressed to look tacticool. The trigger assembly on this Armada is the Marauder trigger assembly and is very, very nice. It may not be a professional target trigger, but you will be spending a whole lot more to have a better trigger.
Noooooo! I forbid everyone from watching this video! You should not learn how simple these things really are! Do not pay any attention to that man standing behind the curtain!
The new generation of airguns, most especially the PCPs, is far more modular than previously. As BB points out, it can be far easier and almost as cheap to swap out a valve assembly than to rebuild one.
With these “old gals” there are not such things, and you must go into the valve assemblies and do the work. It does indeed require a better understanding and more skills to work on the inside of the engine than to just swap it out. I used to own a “Bug”. 😉
Speaking of target pistols. We weren’t? Ah well.
BSA has come out with the Challenger. I strongly suspect it to be the Gamo or the AV V10 with a new name slapped on it. They did manage to bring the price down a good bit though.
*** The fill port seal was extruding, the firing valve seemed to be leaking ***
My wonderer wonders WHY a bunch of o-rings failed.
O-rings in a dynamic application eventually wear and need to be replaced but static o-rings typically last forever unless disturbed or pushed beyond their design (temperature and/or pressure) limits.
Couple of years ago I resealed a friend’s PCP. He had filled the gun to maximum and left it in the car on a sunny day. In the direct sun, the PCP became too hot to hold comfortably. The elevated temperature and pressure went beyond the working range of the o-rings (they became soft) and they failed.
If the glands (o-ring grooves) are correctly designed o-rings are very reliable – assuming that they are assembled properly and not abused.
Usually, if there’s a leak there’s a reason why… Dirt or mechanical damage; harsh chemical cleaners attacking the polymer; extreme temperatures and excessive pressure are the typical culprits.
Hank
Funny you should talk about swapping out VW engines – FM has a cousin who worked for a VW dealer and learned to service and repair aircooled units; later in his college years he would swap out engines for fellow students for $100 a pop. The customer had to furnish the new or rebuilt unit.
Even if FM never has to undertake a serious airgun repair, it is good to learn what makes our “ladies” tick and dance well, whether springers or PCPs. One can always learn something new or at least learn to figure out what one does not know in order to avoid making a mess of things.
FM,
Your Max’s are sooooo simple. They are even easier than the Challenger.
I get the hint.
Things are slowly coming together and leveling out.
Or so it seemed.
Then a new Airgun for the Pyramyd Air cup was delivered last Thursday (I have about a month to get used to it)
And then Umarex dropped a new creation we saw at shot show that needs some attention as well.
After moving I now have a garage to work in and make videos. So yes Tom I have started making them again.
I just have to find my overhead camera mount.
I have a new 3D printer as well so I need to design an assembly tool.
So may things, so little time.
Ian.
Ian,
No sweaty da! You get ready for the Cup.
BB
Finding cheap and readily available parts is a Crosman thing. Good luck trying to find cheap and readily available parts for any of the foreign PCPs. AirForce parts are probably available as well.
David Enoch
DavidEnoch,
” ”
DITTOS!
And NOT just this month, year, or decade!
shootski
In a reference to yesterday’s blog, it was mentioned that today’s PCPs have highly efficient valves. Will a modern airgun give you twenty “lethal” shots from a 46-caliber air rifle inflated to only about 800 PSI?
RidgeRunner,
Hmmm…
Custom built, hand fitted by Master Craftsman, NOT in China, UNAFFORDIUM knowledge vs. slave labor, at best low wage workers using cheapest materials possible/available….
just sayin’
shootski
shootski,
Sometimes it can be difficult to follow what you are sayin’. I think I am following what you are saying here though. Have you priced not made by Wang Po Industries lately? They are made out of UNAFFORDIUM anymore. Yes, the knowledge of how such things are made has been lost over the years. If the knowledge was “found”, could such be mass produced these days? Yes. Will they? Not likely. They are not in fashion. Dennis tried many years ago. No one bought them. He gets real ugly when he even talks about them. Gary made one. I happen to know where it is, but the fellow who has it will want to make too much profit for me to consider it.
RR,
Yes, the Girardoni was beyond the state of the art for its time. But that air tank would leak down in 24-36 hours because the seals were not airtight.
BB
That does not mean that the valve system is not superior to what is available now. With modern sealing techniques, the Girardoni would be a marvel within these times.
RR,
Yes, it is. AirForce Airguns has used a portion of that design and I think reader 45 Bravo will soon be telling all of us about another design that is just as revolutionary.
In fact, RidgeRunner, you just inspired tomorrow’s report!
BB
Wonder if it is the revolutionary design FM just read about in another airgun site…maybe one to “Czech” out. 😉 FM’s lips are sealed. He’s probably wrong anyway.
B.B.,
“… leak down in 24-36 hours…” That is still pretty amazing considering that the butt and ball air tanks were fabricated out of folded Iron!
I wonder if Tar and/or Sisal was the seal? Maybe a leather based system? I think Latex (rubber) came to Europe a few decades later.
shootski
shootski,
I’ll talk about it tomorrow and we will have the weekend to reinvent a possible airgunning future! 😉
BB
B.B.,
Looking forward to it!
;^)
shootski
RR,
Valves perhaps, but they can also have adjustable air regulators and power selectors and hammer spring adjustments to manage air. Not to mention options for semi and full auto fire.
Regulators, power selectors (transfer port sizes), etc. More parts to try and fix the problem created with modern stuff.
RR,
Spoken like a true Curmudgeon! 😉 … We sure do relish the good old days of the past.
LOL! I mean grumble, growl, snarl! 😉
Yeah, like today’s tire pressure sensors in cars – the ones in our Subaru started shooting out false alarms though there was nothing wrong with the pressures…FM told Mrs. we weren’t going to spend a wad of money getting them fixed when all Worst Half had to do was walk around with a simple gauge and keep tabs on the tires. Funny thing, the problem appears to have “autocorrected.” Maybe the little sensors figured out FM wasn’t gonna cater to their whining.
Very likely. I do not give them much heed myself. Fortunately, they have been quite for some time now.
BB,
Funny how what we perceive as new has actually been done before. Great analogy to the VW Beetle. Anyways, the Sheridan Model A & B from 1947 had a replaceable valve assembly that isn’t user serviceable (for most people) that was changed out if it started leaking. The later Benjamin/Crosman multi-pump rifles also have a replaceable valve design. So there are two OLD examples of what Crosman is still doing today.
Cloud 9,
I myself have not experience with these air rifles, but from TCFKAC, why change something that works. TCFKAC has become famous for recycling their old solutions, parts, etcetera over the years. Many of the parts of their new 3622 have been around for quite a few years on Discos, 2240s, etcetera.
The 2260 became the Discovery which became the Maximus which became the Fortitude. Many of the parts of these earlier airguns are on the 362 and the latest and greatest 3622.
Yes, I know you are aware of all of this, but I just thought some of the others might want to know/remember some of this stuff.
They are not the only ones who do this. If you look at AirForce airguns you will see a line of progression using some of the same parts on their airguns from one year to the next.
All manufacturers do this, not just airguns. The old parts have been designed, developed, made, stocked, etcetera. Why not use them and save money?
This is one of the myriad reasons many manufacturers are so slow to accept new ideas. Change can be very expensive.