by Tom Gaylord
Writing as B.B. Pelletier
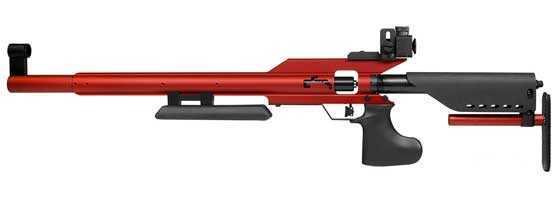
AirForce Edge.
Part 1
Part 2
Part 3
Part 4
Part 5
AirForce Edge 10-meter target rifle: Part 1
AirForce Edge 10-meter target rifle: Part 2
This report covers:
- Accuracy day
- Dropped a shot
- What was happening?
- The problem
- Went to AirForce
- Adjusting an Edge top hat
- Purpose of the o-rings
- Adjusted the top hat
- RWS Basic
- H&N Finale Match Light
- RWS R10 Match Pistol
- Sig Match Ballistic Alloy
- Shot count
- Off the regulator
- One last thing
- Summary
Oh, boy! Every once in awhile something big happens with this blog, and today is a report on such a time. This is about the AirForce Edge.
To tell the complete story I first have to tell you some bad news. I want you to read it without getting angry, because if it hadn’t happened as it did I would not be able to tell you the extraordinary news I’m about to tell you.
Accuracy day
This report was supposed to be the first test for accuracy. I knew there were going to be several accuracy tests, but this would be the first one. Except the rifle didn’t cooperate.
I spent a hour sighting in and then shooting the first three groups. I have a lot to tell you about adjusting the rear sight, but that will wait until another time, because what I have for you today is much more important.
Dropped a shot
I was shooting RWS R10 Match Pistol pellets that showed every possibility of grouping extremely well — UNTIL! Until I heard a shot go out that was audibly much slower than the rest. When I looked through the spotting scope I saw that pellet had dropped about a half-inch. A half-inch for a 10-meter target rifle shooting at 10 meters is like trying to fly to Buffalo and landing in Cleveland, instead! I was shocked!
I thought the only thing to do was shoot another group and see what happened. The first two shots went through the same hole, then shot three landed a half-inch below them and shot four was another half-inch below that. Test over!
What was happening?
I took the rifle back to my office and examined it, and the o-rings that both Chris USA and GunFun1 commented on in Part 2 were even more off-center than before. Okay — BB was wrong when he told Chris USA there was no problem with those rings. Apparently there was a problem. But it wasn’t with the rings themselves. Wait for it.
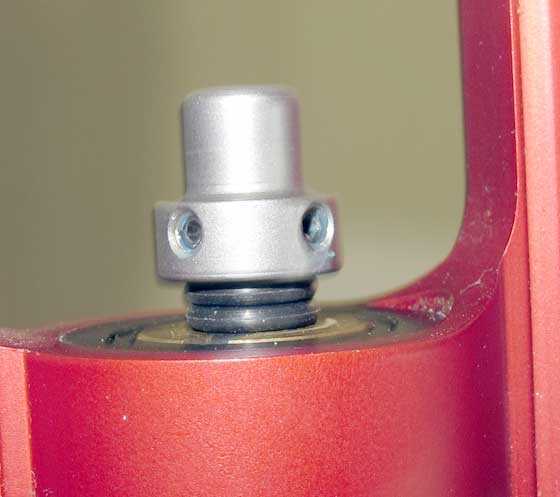
This is the photo that several readers didn’t like. They felt that the o-rings sitting askew like this was messing with the rifle’s output. There was a problem, but this wasn’t exactly it. Still, these o-rings don’t have to look like this.
The problem
We haven’t gotten to the problem yet! But I thought I would remove those two o-rings and replace them with something that fits the valve stem better, and do you know what I discovered? The two Allen screws that anchor the top hat to the valve stem were not tight! Every time I closed the bolt, it rotated the top hat by a small amount — or at least it had the potential to! That was the problem!
Once the top hat was off the valve stem, I removed the two o-rings AirForce had installed and replaced them with two metric 007 Buna o-rings. But you need to understand that those o-rings have very little to do with the velocity of the airgun! The distance that the top hat travels has a lot to do with it! And there is more. I have more to tell you about what the o-rings do in a little bit, but right now let’s move on.

Went to AirForce
I took the AirForce o-rings and one of my 007 o-rings to AirForce to speak with Ton Jones who had personally set this rifle up for me. I told him the Allen screws that lock the top hat in place had not been tightened and he was surprised — at first. Then he remembered that he had set up this valve and reservoir for me and gave it directly to me, instead of sending it on to the next AirForce station. Ton had snugged both screws down but not tightened them. At the next station another worker unscrews each Allen screw one at a time and dips it into blue Locktite! Then the worker tightens the locking screws tight so the top hat remains were it was adjusted by either Ton or one other person who adjusts each Edge over a chronograph.
I showed Ton the Part 2 photo of the top hat with the wonky o-rings (shown above) that you readers took exception to. He said yes, the rings askew like that is a problem, but not a big one because the top hat isn’t supposed to even touch the top o-ring when it is set correctly. HUH?
Adjusting an Edge top hat
What I am about to tell you has only come to light in the past month. Until right now AirForce had a different procedure and specification for adjusting the Edge top hat. But Ton Jones took an Edge to his wife’s parents’ home in Slovakia on vacation last year and he got it working very well. When he told the owner of AirForce about his experience he was asked to determine exactly what he had done and write it all down for a new specification. That work took him many weeks, intermingled with his other duties, but he has now codified the top hat adjustment procedure for everyone.
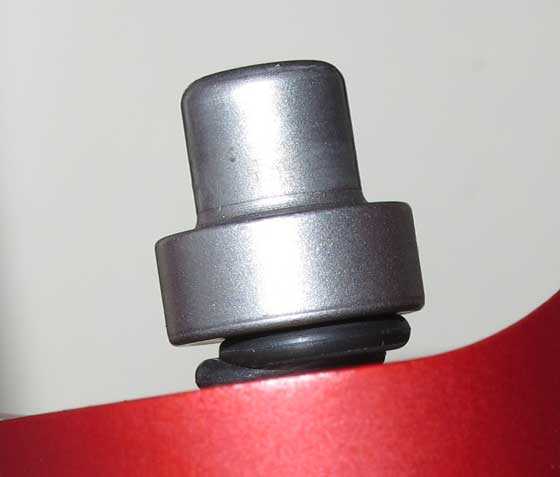
To adjust the Edge top hat, first make sure both of the locking screws on its periphery are loose and the top hat turns freely on the valve stem. Then cock the rifle and watch the top hat as the bolt comes back to its rearward position. When the top hat just turns just a little as the bolt is closed, it is adjusted correctly. With the o-rings AirForce was putting on the valve stem there will be a clearance of about one o-ring’s width above the top o-ring and the bottom of the top hat when it is set properly. With the fatter o-rings (the metric 007 rings) that I am using, there is only a thin sliver of clearance between the top of the o-rings and the bottom of the top hat. Each rifle is different though and must be adjusted by hand this way.
Purpose of the o-rings
The o-rings are there to control the amount of distance the valve opens — BUT by the time the top hat starts to compress them, the pellet is almost out of the barrel. They don’t really control the velocity of the pellet; they control the amount of air that’s wasted after the pellet leaves the barrel. The valve return spring tension, the length of the valve stem travel (controlled by the top hat) and the regulator pressure setting control the pellet’s velocity. And each airgun is different.
I have prepared a short video to show you how the top hat is adjusted.