pellet trap
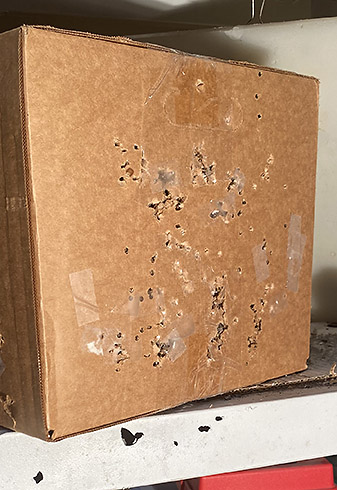
A new pellet trap
Vana2 talked about a more permanent rubber mulch pellet trap that will last longer than my cardboard box trap and I asked him to write this guest blog about it.
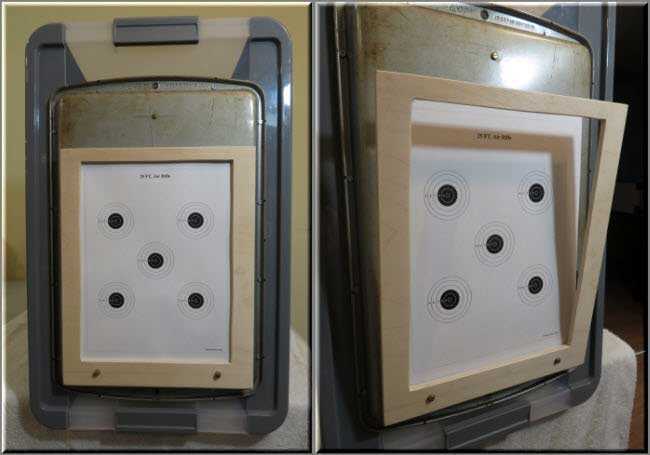
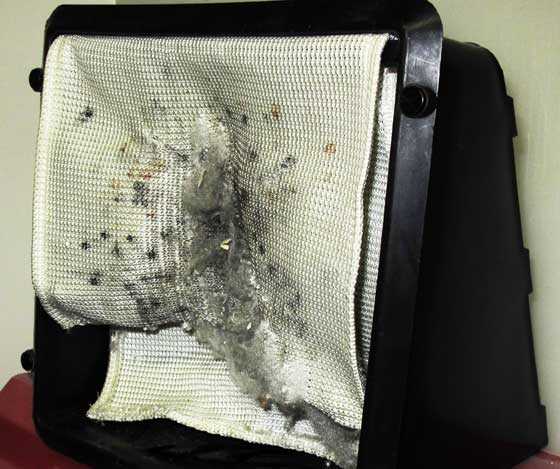
An update on the rubber mulch pellet and BB trap
I have to give you an update on the rubber mulch pellet and BB trap. This thing is phenomenal!
With airguns home IS the range! — Part1

by Tom GaylordWriting as B.B. Pelletier This report covers: The indoor range Quiet airguns The 499 Quiet traps Build your own trap What about more powerful airguns? You don’t have to just shoot paper indoors Safety Distance Pellet trap Lighting Shooting table Shooting at home is fun! Your turn Some of you are sitting at … Read more
World’s best pellet trap
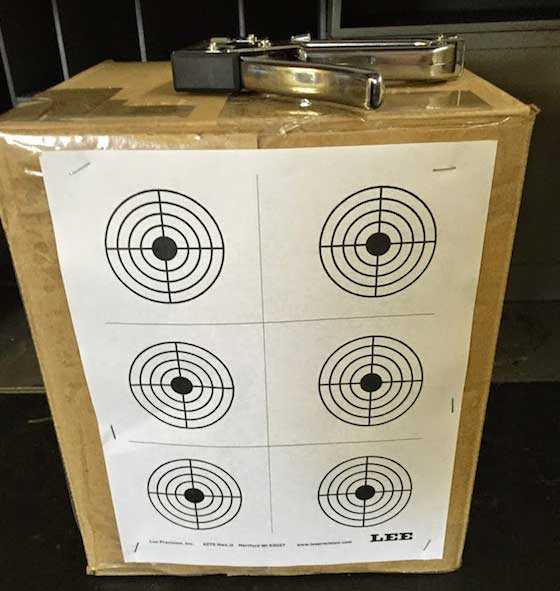
by Tom Gaylord Writing as B.B. Pelletier Today’s report is a guest blog from reader Rod about an economical and yet very effective pellet trap he created. If you’d like to write a guest post for this blog, please email me. Over to you, Rod. This report covers: Humble beginnings Silent running, Gen 1 A better … Read more
Safe backstops and bullet traps
by B.B. Pelletier Many of us shoot our airguns inside the house, garage or barn and need to stop our projectiles from damaging what’s behind the target. Today, I want to talk about what works, what doesn’t and why. My sermon today is in the form of a repentant sinner, because I’ve made most of … Read more
Weihrauch HW 100 S FSB PCP rifle: Part 3
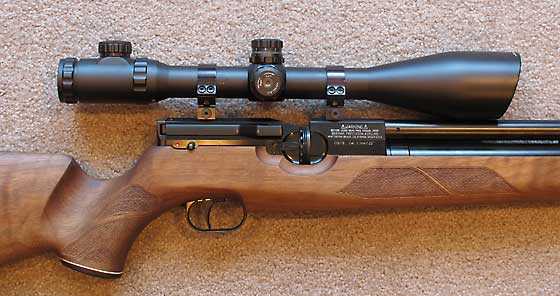
by B.B. Pelletier Part 1 Part 2 This is the actual rifle I’m testing. Isn’t that wood beautiful? Before I begin, at the end of this report there is a lengthy Q&A section in which Dr. Mirfee Ungier, wife of Pyramyd AIR owner Joshua Ungier, answers a number of questions about protective eyewear and other … Read more
