by Tom Gaylord
Writing as B.B. Pelletier
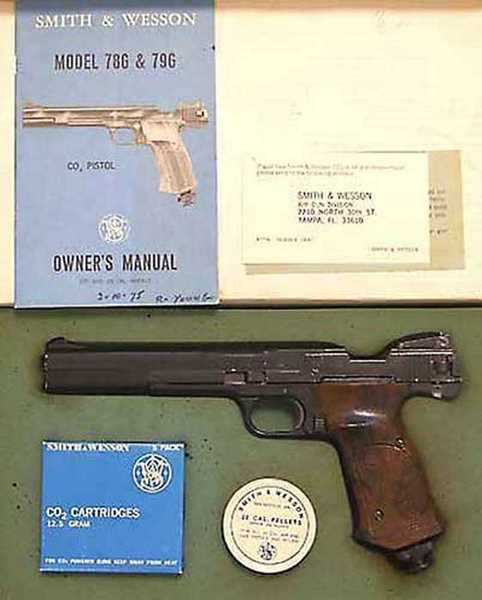
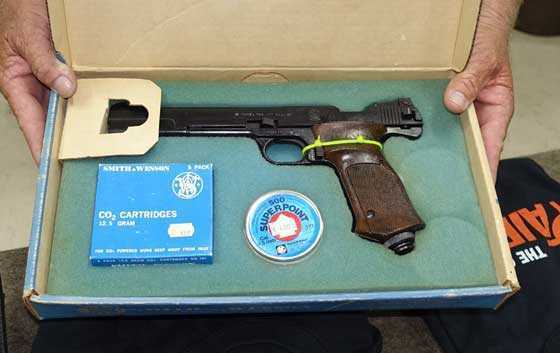
My S&W 78G pistol.
Today’s report is written by reader 45Bravo. This is his report to us on resealing the S&W 78G and 79G.
If you’d like to write a guest post for this blog, please email me.
And now, over to you, 45Bravo.
Resealing the Smith & Wesson 78G
This report covers:
- Where to start?
- The reseal
- Get started
- Assembly
- Wrapping it all up
So, all of the gas leaks out of your Smith & Wesson pistol as soon as you pierce the CO2 cartridge. It’s probably the piercing pin seal. Since these pistols are now over 40 years old, they need TLC. (And I’m not talking about the TV channel.)
Where to start?
The factory seals didn’t fare well with the lubricants used by most shooters at the time these guns were made, and the seals disintegrated over time. If you are going to change seals, I suggest changing them all at the same time.
Since this is a CO2 gun, you want to use o-rings that are not affected by carbon dioxide. If you use a standard hardware store o-ring, the CO2 gets absorbed into the o-ring material, causing it to swell to several times its normal size. The wrong type of o-ring on the outer rim of the piercing cap will continue to hold the cap tight, even when your cartridge is empty. It will be quite awhile for the o-ring to shrink back to its original size so you can open the cap and change the cartridge.
There are a couple of places in the gun where you probably could use regular hardware store o-rings, like in places where they are captive, but I would not suggest that unless you want to go back inside the pistol again in a year or so. Urethane o-rings are the best. With proper care, you should not have to reseal the gun for decades.
Normally I use a complete kit from Mac1 Airguns that includes a new redesigned poppet (Ed. — valve), and a complete set of 90-durometer Mil-Spec urethane o-rings.
But not everyone wants to or even can spend $35 on their project, so I decided to source a set of urethane seals from eBay without the valve as a test to see how well they work compared to the others. There are several sellers on ebay selling different seal kits, I chose the one that offered urethane seals with free shipping, and a good price.
A single set that works for both the .177 and .22 costs $5.50, but 2 sets were $7.15, shipped from a U.S. seller. I ordered them on Monday, they arrived on Saturday.
The seller also includes an exploded view, and an o-ring size reference as to where they go in the gun.

Ebay seal kit comes with seals and a diagram.
Normally, the seal inside the poppet is trashed like the rest of the seals, but the one in the gun I am resealing looks new. Since this is going to be a budget reseal test, I decided not to change it. I just replaced the o-rings, and will see how long it runs.
The reseal
As we go I will offer some tips to make things go easier and faster.
The largest o-ring goes on the co2 cap.
The next smaller one goes on the valve body plug.
Then there are 4 smaller o-rings that are the same size. They are used on the .22 bolt probe, the cartridge connector, and inside the piercing cap.
The single smallest o-ring is for the .177 bolt probe.
Tip: I suggest using a small zip tie, or velcro cable management tie like you use to hold laptop power cables to hold the trigger rearward while you do the reseal.
Using the cable tie is not necessary, but the trigger spring can be a little fiddly to get back in position, and you need an 11th finger to hold the trigger to the rear during assembly if you don’t use something to hold it.
Get started
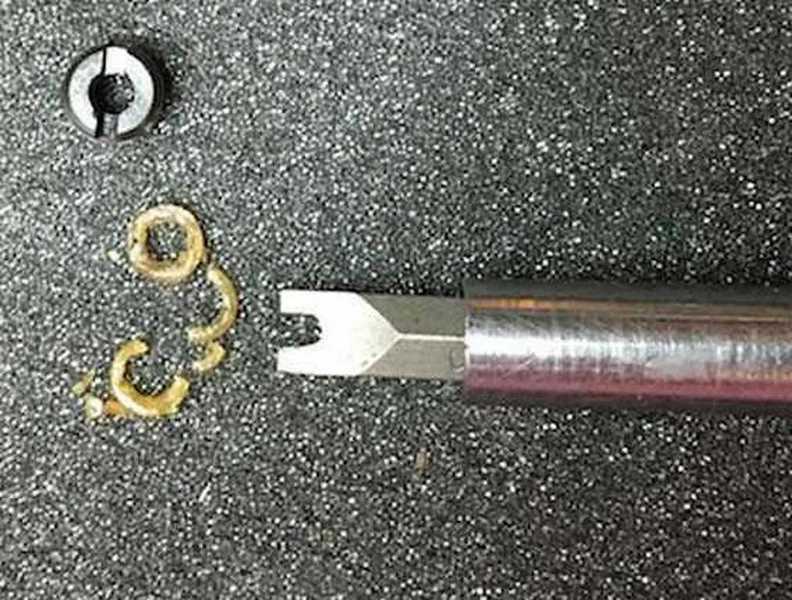
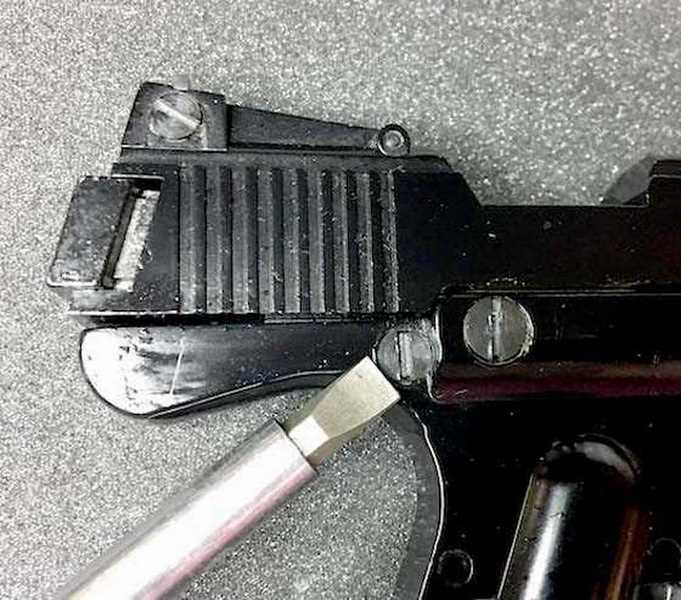
The seal that fails most often, and the easiest one to change, is the one in the piercing cap. You do not have to disassemble the entire cap to change the o-ring, just have the right tool for the job.
Tip: You can use a Dremel tool, or a file to modify a screwdriver tip as shown to make a tool that clears the piercing pin, but lets you unscrew the seal cover.
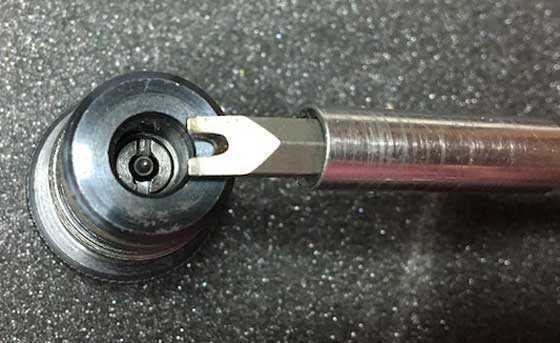
The right tool for the job. Sometimes you have to make it!
Use a dental pick or similar tool to carefully remove the old seal. Clean the inside carefully, lightly lube the replacement o-ring with your choice of lube then center it over the piercing pin, and then screw the seal cover back in place.
Since this is a budget build, I am using Crosman Pellgunoil as a lubricant, because I am sure every CO2 shooter has some on hand.
Then remove the large old cap seal o-ring, clean the groove and put the new largest o-ring on the outer part of the piercing cap.
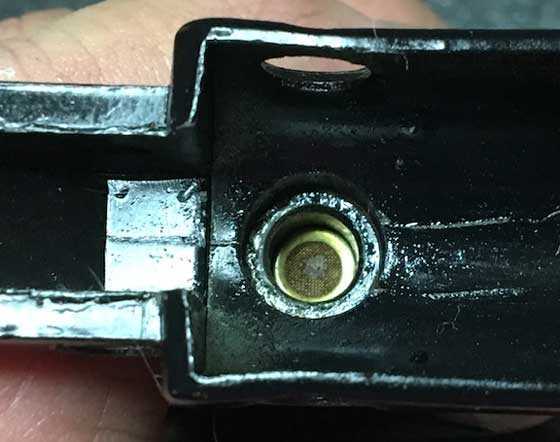
All of the seals/o-rings in this pistol were in this condition. This one seals the piercing pin inside the cap.
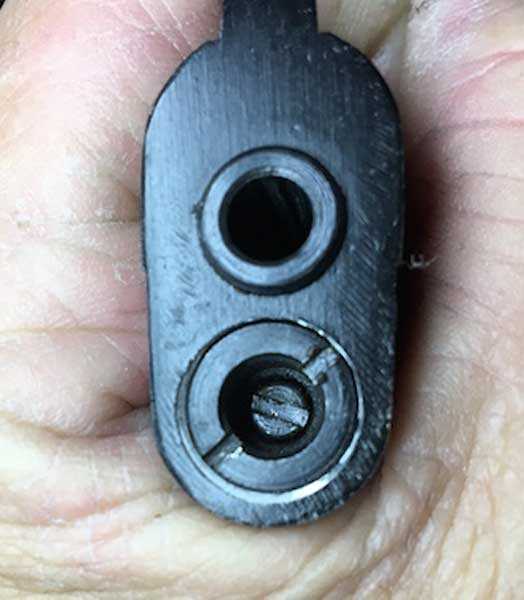
Remove the grip screws and grips, and then the rear screw under the right grip as shown below.
The rear screw on the right side of the grip is the takedown screw.
Then remove the power adjuster outer screw below the barrel.
Remove the outer power adjuster screw at the muzzle.
Tip: You can insert the eraser end of a pencil into the hole to remove the outer sleeve the power adjuster rides in.
The slide now comes off the frame. Be careful of the pin that holds the bolt in place.
Remove the bolt, and replace the old o-ring on the bolt probe with one of the 4 o-rings that are the same size.
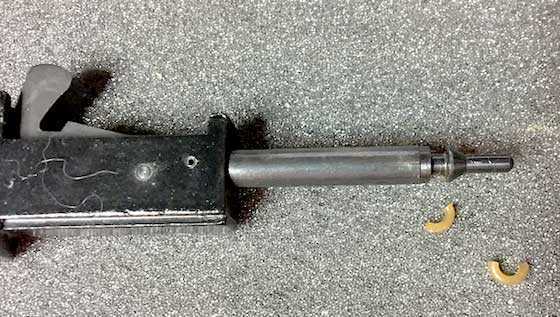
The bolt or probe comes out of the pistol and the o-ring needs to be replaced.
Now, remove the 3 screws that hold the valve in the frame.
Tip: For pry tools on guns I use bamboo chopsticks from the Chinese restaurants. They don’t mar the finish, and they are free…
Remove the valve cartridge, it may take some gentle persuasion as there is a short tube that goes from the valve into the frame. That tube passes gas from the CO2 cartridge into the valve. It is called the cartridge connector.
In the frame, under the valve cartridge connecting tube is a very small brass screen, be careful to not lose or damage it, as it protects your valve from debris that might get into the system.
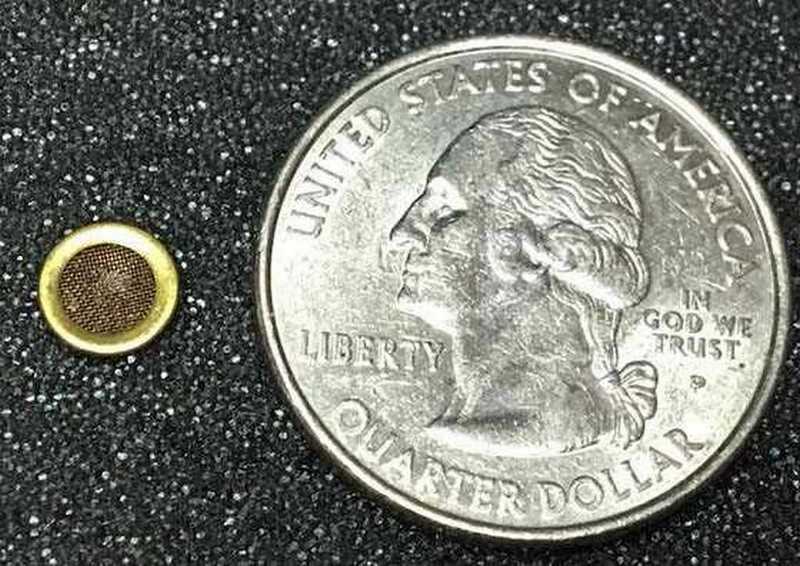
This tiny screen under the cartridge connector (gas transfer port) keeps dirt from entering the valve.
The rear of the valve cartridge is held in place by the cartridge connector, the rear cap is under spring pressure by the valve spring.
Once the cartridge connector is removed, the rear of the valve comes out.
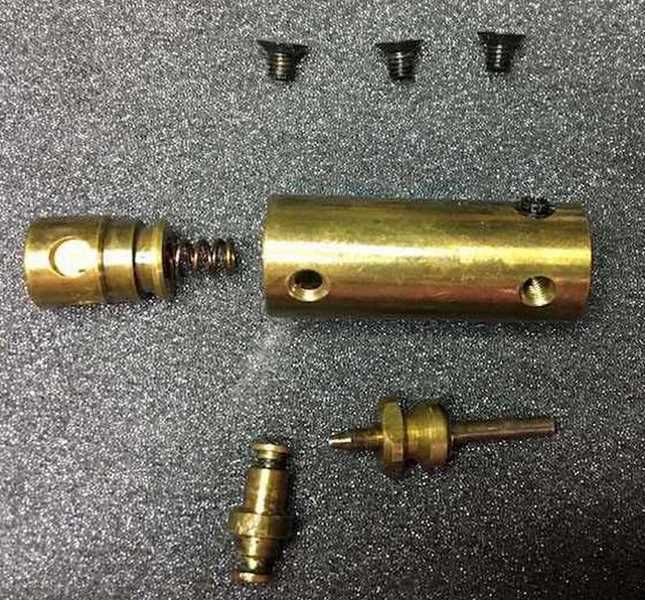
The valve parts.
The second largest o-ring goes on the valve body cap.
The cartridge connector gets an o-ring on each end.
Tip: when assembling the valve, the longer end of the cartridge connector goes into the valve.
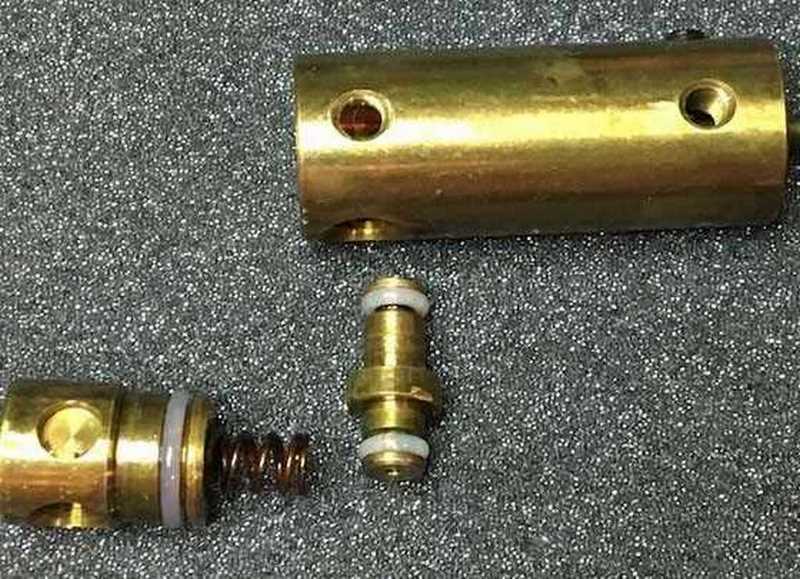
The 0-rings are in place. Note that the long end of the cartridge connector (gas transfer port) goes into the valve body.
Assembly
Make sure the small brass screen is down in the hole that the cartridge connector goes in.
The tiny screen is back in place in the frame, where the cartridge connector will go.
Once the valve is in place, replace the 3 screws that secure the valve.
Tip: I use blue Locktite thread locker on the screws that go into the valve body to help prevent any possible gas leak at these points.
Tip: Be careful not to tighten these screws too much as they will bend the cast frame. Eventually a crack will form at this point.
Smith and Wesson uses a metal-to-metal fit for the transfer port that connects the valve to the barrel. If it’s not aligned correctly, you will get a puff of gas from this point when you fire the gun.
Tip: To solve this problem, and make the alignment a little less critical, I use a small piece of silicone tubing to make a thin o-ring to seal this junction.
The silicone tubing I use is silicone fuel line left over from working on nitromethane-powered radio control vehicles. (one of my other hobbies.) It’s 3mm (1/8-inch) inside diameter for .60 engines and up. You can get 2 feet of it from Tower Hobbies for $2.69 and that will be enough for a lifetime of uses. I will have another guest blog project for you in the future that also uses this tubing, so it won’t go to waste.
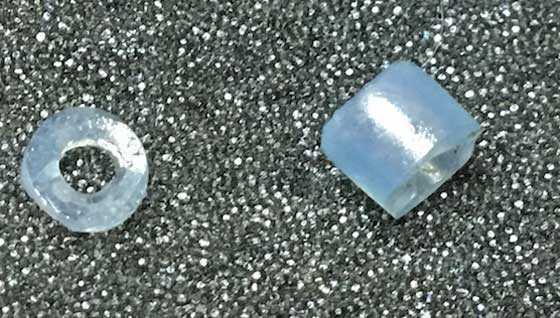
A thin slice of silicone tubing (left) makes a good seal for the gas transfer port that connects the valve to the barrel.
It’s just the right diameter, and very pliable, and I can cut it to the thickness I need.
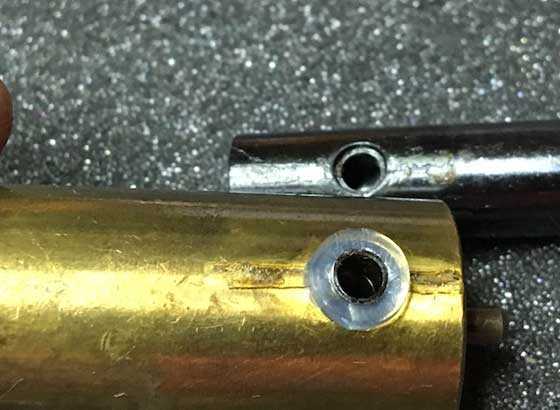
Here is the tubing seal on the gas transfer port that connects to the barrel.
When I assemble the slide, I loosen the barrel set screw just ahead of the loading port on top of the slide to ease assembly.
Tip: The eBay seller of this o-ring kit gives you a FREE exploded view of the pistol. Use it to double check the orientation of your parts during assembly.
Put the hammer, hammer spring, and the hammer spring pad assembly back in place, make sure the barrel port is aligned with the transfer port.
Put the rear disassembly screw back in, then insert the power adjuster assembly from the muzzle end.
Tip: Now I press the barrel rearward just enough to seat it in place, while holding it rearward, close the bolt completely, then tighten the barrel set screw in the upper that is in front of the loading port.
This set screw presses the barrel down onto the transfer port and valve, as you tighten it, try to close the bolt, if you tighten the barrel set screw too much, it will push the barrel out of alignment, and the bolt probe will not want to go into the barrel, so adjust accordingly.
Wrapping it all up
What do I think of these budget urethane seals? They are not as hard as the Mac1 seals, so they are easier to put in place. But they are harder than normal o-rings.
I heat the Mac1 seals with a blow dryer to soften them. It makes assembly easier.
Because of the hardness of the 90-durometer seals he sells, Mac1 also suggest when you pressurize the gun for the first time, insert the co2 cartridge, then heat the gun to “toasty warm” before piercing the cartridge. That will increase the co2 pressure and soften the seals.
I have left the pistol in the sun to do this, and I have also used a blow dryer. Both worked well, but monitor how warm the gun is either way you decide to try.
Tip: Leave the grips off when warming the gun, and don’t get the blow dryer too close to the gun to harm the finish.
Cock the hammer, put the gun on safe, and then pierce the cartridge.
After piercing the cartridge, and listening for leaks, I dry fire it a few times, then to test the transfer port and bolt seal, I then load a pellet, and lay a sheet of toilet tissue over the breech area and fire the pellet in a safe direction, if there is a leak from the transfer port area, or the bolt seal, this will show you.
As Tom mentioned in an earlier part of this series, always leave a partially charged cartridge in the gun.
Hopefully this will help anyone who has one of these pistols that leaks take the plunge to reseal it yourself.
These air pistols are accurate, excellent quality, easy to work on, and loads of fun to shoot.
If you use quality replacement parts, it will be another 40 plus years before it needs sealing again.
45 Bravo